Discovering mould on your walls can be alarming, but with the right approach and tools, you can tackle this problem effectively. This comprehensive guide will walk you through everything you need to know about eliminating mould from your walls and keeping it from coming back.
Understanding Mould Growth on Walls
Before you start the removal process, it’s helpful to understand what you’re dealing with. Mould thrives in damp, humid environments and can appear as black, green, or white patches on your walls. It often develops in areas with poor ventilation, water leaks, or high moisture levels like bathrooms, basements, and laundries.
Safety First: What You Need Before Starting
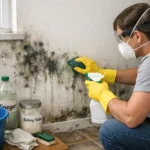
Safety should always be your top priority when dealing with mould. The spores can irritate your respiratory system and cause allergic reactions, so proper protection is essential.
Essential Safety Gear:
- P2 respirator mask or higher-grade mask
- Rubber gloves that extend to your forearms
- Safety goggles to protect your eyes
- Old clothes that you can wash immediately after
- Plastic sheeting to protect floors and furniture
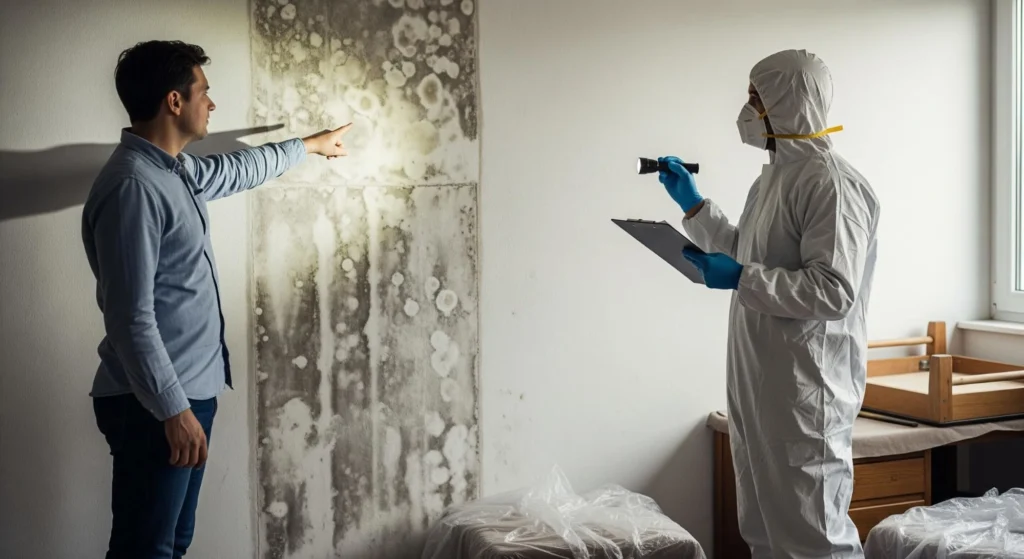
Step 1: Assess the Extent of the Problem
Walk around your home and identify all areas affected by mould. Small patches (less than one square metre) are generally safe to handle yourself. If you’re dealing with extensive mould coverage, you might need professional help.
Check behind furniture, under sinks, and in corners where air circulation is limited. Take photos to document the situation before you begin the removal process.
Step 2: Prepare Your Work Area
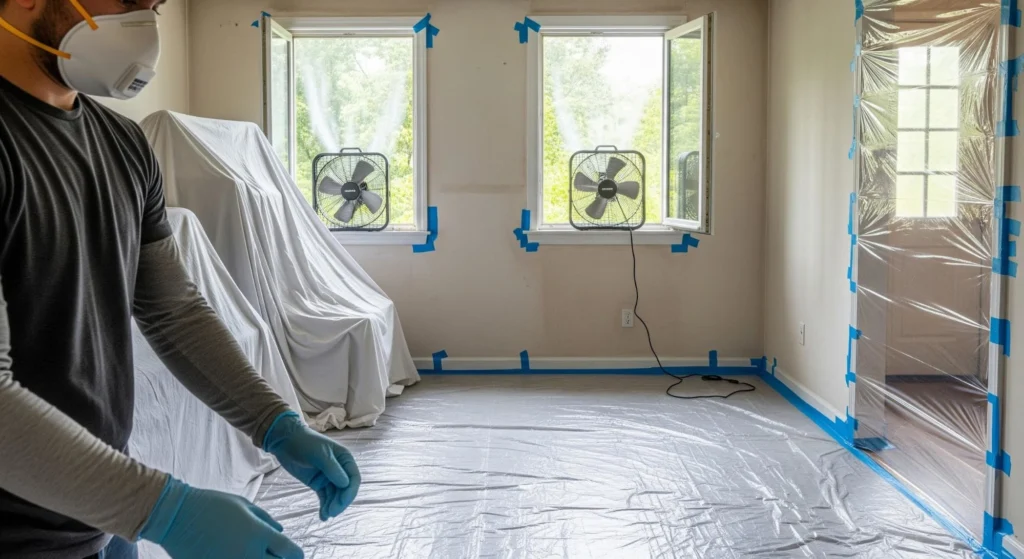
Proper preparation makes the cleaning process much easier and prevents mould spores from spreading to other areas of your home.
Start by opening windows in the affected room to improve ventilation. Use fans to direct air outside, but avoid pointing them at the mouldy area, as this can spread spores throughout your home.
Remove any furniture, decorations, or items near the affected walls. Cover the floor with plastic sheeting and tape it down securely. If you can, seal off the room from the rest of your house using plastic sheeting over doorways.
Step 3: Gather Your Cleaning Supplies
You don’t need expensive commercial products to remove mould from walls effectively. Many household items work brilliantly.
Effective Cleaning Solutions:
- White vinegar (undiluted)
- Bicarb soda mixed with water
- Hydrogen peroxide (3% solution)
- Borax dissolved in warm water
- Commercial mould removers (if preferred)
You’ll also need spray bottles, scrub brushes with stiff bristles, sponges, buckets, and plenty of clean rags or paper towels.
Step 4: Choose Your Cleaning Method
Different cleaning solutions work best for different situations. Here are the most effective methods to remove mould from walls.
Vinegar Method: Pour undiluted white vinegar into a spray bottle. Spray the mouldy area generously and let it sit for at least one hour. The acetic acid in vinegar kills most mould species. After waiting, scrub the area with a brush and wipe clean with water. Allow the wall to dry completely.
Bicarb Soda Solution: Mix one quarter tablespoon of bicarb soda with water in a spray bottle. Shake well until dissolved. Spray onto the mouldy surface and scrub with a brush to remove the mould from the wall material. Rinse with clean water and spray again lightly without wiping. This leaves a protective layer that helps prevent future growth.
Hydrogen Peroxide Treatment: Pour 3% hydrogen peroxide into a spray bottle without diluting. Spray the affected area thoroughly and leave it for ten minutes. The peroxide will fizz and work to kill the mould. Scrub the area and wipe clean with a damp cloth.
Borax Solution: Combine one cup of borax with one gallon of warm water. Stir until the borax dissolves completely. Apply the solution with a scrub brush, working it into the wall surface. Wipe away excess liquid but don’t rinse. The borax residue helps prevent regrowth.
Step 5: Scrub Thoroughly and Systematically
Now comes the physical work of removing the mould. Start at the top of the affected area and work your way down. This prevents dirty water from running over areas you’ve already cleaned.
Use firm, circular motions with your scrub brush. For stubborn mould, you may need to apply your cleaning solution multiple times. Don’t be discouraged if it takes several applications to completely remove mould from walls, especially if it’s been there for a while.
For textured walls or grout lines, an old toothbrush works well for getting into crevices. Be patient and thorough during this step.
Step 6: Dry the Area Completely
Moisture is mould’s best mate, so proper drying is crucial. After you’ve finished scrubbing and wiping down the walls, use fans, dehumidifiers, or open windows to dry the area as quickly as possible.
Run a dehumidifier in the room for several hours or even a full day if the humidity is high. Point fans directly at the cleaned walls to speed up the drying process. The goal is to get the area completely dry within 24 hours.
Step 7: Inspect and Repeat if Necessary
Once the walls are dry, inspect your work carefully. Look for any remaining discolouration or signs of mould. If you spot any lingering patches, repeat the cleaning process on those specific areas.
Sometimes mould can penetrate deeply into porous materials like plasterboard. If the mould returns quickly after cleaning or if the wall material feels soft or damaged, the plasterboard may need to be replaced.
Step 8: Dispose of Materials Properly
Seal all cleaning materials, rags, and protective gear in heavy-duty plastic bags before disposing of them. This prevents mould spores from spreading during disposal.
Wash any clothes you wore during the cleaning process separately from other laundry using hot water and detergent. Clean your scrub brushes thoroughly with hot, soapy water or dispose of them if they’re inexpensive.
Preventing Future Mould Growth
Successfully removing mould is only half the battle. Preventing it from returning requires addressing the underlying moisture issues.
Prevention Strategies:
- Fix any water leaks in pipes, roofs, or windows immediately
- Use exhaust fans in bathrooms and kitchens during and after showering or cooking
- Keep indoor humidity levels between 30 and 50 per cent
- Ensure proper ventilation throughout your home
- Clean and dry any wet spills or flooding within 24 to 48 hours
- Regularly inspect areas prone to moisture buildup
- Consider using a dehumidifier in damp areas like basements and laundries
- Don’t let wet towels or clothes sit in closed spaces
When to Call in Professional Help
Whilst many mould situations can be handled with DIY methods, some circumstances require professional expertise. Consider calling in experts if the affected area is larger than one square metre, if the mould returns quickly after cleaning, if you have health conditions that make you vulnerable to mould exposure, or if the mould growth resulted from contaminated water like sewage.
Your Partner in Mould Removal
Taking on a mould problem yourself can be rewarding and cost-effective, but we understand that sometimes you need expert assistance. Whether you’re dealing with extensive mould growth, don’t have the time for a thorough DIY approach, or simply want the peace of mind that comes with professional service, Bearaux Cleaning is here to help.
Our experienced team uses professional-grade equipment and proven techniques to safely and effectively remove mould from walls and other surfaces in your home. We don’t just eliminate visible mould; we address the root causes to help prevent future problems. If you need assistance with your mould removal project or want a professional assessment of your situation, Beaurex Cleaning has the expertise and tools to restore your home to a clean, healthy state.
Don’t let mould compromise your home’s safety and your family’s health. With the right approach, whether DIY or professional, you can successfully tackle this common household problem and enjoy clean, mould-free walls for years to come.
FAQs
1. What safety gear do I need when removing mould from walls?
You’ll need a P2 respirator mask or higher grade, rubber gloves extending to your forearms, safety goggles, and old clothes you can wash immediately after. It’s also recommended to use plastic sheeting to protect floors and furniture from contamination during the cleaning process.
2. How much mould can I safely remove myself?
Small patches of mould covering less than one square metre are generally safe to handle yourself with proper safety equipment. If you’re dealing with extensive mould coverage beyond this size, or if the mould keeps returning after cleaning, it’s best to seek professional help.
3. What household products effectively kill mould?
Undiluted white vinegar, bicarb soda mixed with water, 3% hydrogen peroxide, and borax dissolved in warm water are all effective against mould. These household items work brilliantly and you don’t need expensive commercial products to successfully remove mould from your walls.
4. How long should I let cleaning solutions sit on mouldy walls?
White vinegar should sit for at least one hour, hydrogen peroxide needs ten minutes to work, whilst bicarb soda and borax solutions should be scrubbed in immediately. After scrubbing, some solutions like bicarb soda and borax can be left as a light residue to help prevent future mould growth.
5. Why does mould keep growing on my walls?
Mould thrives in damp, humid environments and returns when underlying moisture issues aren’t addressed. Common causes include water leaks in pipes or roofs, poor ventilation, high indoor humidity levels above 50%, and wet spills that aren’t dried within 24 to 48 hours.
6. How quickly do I need to dry walls after cleaning mould?
You should aim to get the cleaned area completely dry within 24 hours of finishing the cleaning process. Use fans, dehumidifiers, or open windows to speed up drying, as moisture is mould’s best friend and any remaining dampness will encourage regrowth.
7. What humidity level prevents mould growth indoors?
Indoor humidity levels should be kept between 30 and 50 per cent to prevent mould growth. You can achieve this by using dehumidifiers in damp areas like basements and laundries, running exhaust fans during cooking and showering, and ensuring proper ventilation throughout your home.
8. When should I replace plasterboard instead of just cleaning it?
If mould returns quickly after thorough cleaning, if the wall material feels soft or damaged, or if the mould has penetrated deeply into porous materials, the plasterboard may need replacing. Mould can grow within the plasterboard itself, making surface cleaning ineffective in these cases.
9. How do I prevent mould spores from spreading during cleaning?
Open windows for ventilation and use fans to direct air outside, but never point fans at the mouldy area as this spreads spores. Seal off the affected room with plastic sheeting over doorways, cover floors with plastic, and dispose of all cleaning materials in sealed heavy-duty plastic bags.
10. What should I do with clothes and tools after cleaning mould?
Wash any clothes worn during cleaning separately from other laundry using hot water and detergent. Clean scrub brushes thoroughly with hot, soapy water or dispose of them if inexpensive. Seal all disposable materials, rags, and protective gear in heavy-duty plastic bags before throwing them away.